
A shed can hold a surprising mix of hand tools, seasonal supplies, equipment, and materials. Without a plan, the items you use most can end up behind everything else. A useful storage shed organization system starts with what you own and how you move through the building. Then you can choose shelves, hooks, bins, or work surfaces that fit the job.
1. Start With a Shed Cleanout and Inventory
Before buying storage products, clear enough space to see the floor and walls. Sort the contents into a few groups: tools you use often, seasonal items, equipment, supplies, and things that no longer belong in the shed.
As you sort, make a short inventory of the largest items, how often you use them, and any special storage needs so you can plan around the equipment you own and avoid buying shelves or bins that do not fit.
Set aside items that need a closer decision, such as old chemicals, damaged tools, or products with storage instructions. Check their labels and local disposal guidance before moving or discarding them.
2. Plan Storage Zones Around How You Use the Shed
Put the items you reach for often near the entrance. Keep seasonal or occasional-use supplies farther back or higher only if you can still retrieve them safely. Grouping by task can also help: hand tools in one area, maintenance supplies in another, and larger equipment in a clear parking zone.
A basic zone plan might include:
- Entry area: Frequently used tools and small supplies.
- Equipment area: The largest items, with a direct route to the door.
- Wall storage: Items that fit an appropriate shelf, rack, or hook system.
- Work area: A bench or surface if you regularly repair or prepare equipment.
- Seasonal storage: Clearly labeled goods used only at certain times of year.
The best arrangement depends on what you store and how you use the shed. Leave room to get to less-used items without having to unload the whole building.
3. Use Vertical Space With Shelves, Hooks, and Wall Storage
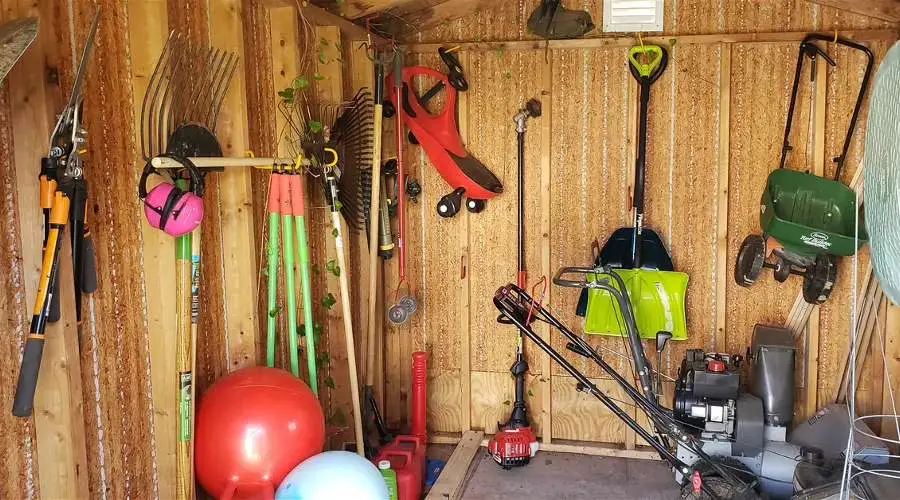
Shelves, hooks, pegboards, bins, and workbench storage can move suitable items off the floor. Choose each option based on the item’s size, weight, and how often you need it. Wall storage can preserve walking and equipment space, but the shed wall and attachment hardware must be suitable for the load.
Check the storage product’s rating and installation instructions. Confirm that the attachment point is appropriate for the building structure. Keep heavier items low where practical, and do not treat a wall, ceiling, or loft as a storage support unless its capacity is known.
Keep small, related items together in a clearly labeled bin when the contents are safe to store as a group, and secure sharp tools so their edges cannot be hidden among loose supplies.
4. Keep the Floor and Main Access Routes Clear
Plan the route from the entrance to the largest piece of equipment before filling the walls with storage. Check that doors can open as intended and that you can move equipment in and out without shifting a stack of supplies each time.
Door placement affects traffic and the amount of uninterrupted wall space available for storage. If you are organizing an existing shed, work with the openings you have. If you are planning a new building, consider the equipment, door opening, and storage zones together before settling on a layout.
Do not rely on a generic aisle measurement. The space you need depends on the equipment, door arrangement, and how you operate it. Measure the largest item and its path, then keep the route clear.
5. Store Tools, Equipment, and Seasonal Supplies by Category
Group items by task or season, then make the contents easy to identify. Labels help when containers look alike or when supplies are stored out of sight. Place the label where you can read it without moving other items.
Check product instructions before storing fuels, chemicals, batteries, electronics, or temperature-sensitive goods. A general-purpose plastic bin is not automatically suitable for every material. Keep hazardous and sharp items controlled, and follow applicable instructions for storage and disposal.
For seasonal goods, group items by when you will need them. Keep the next season’s supplies more accessible than items that will stay stored for months. Before putting delicate or sensitive items away, check whether an unconditioned shed is suitable for them.
6. Adjust the Layout for a Small Shed or Larger Equipment Shed
In a small shed, start with the items you truly need to keep there. Use wall space for suitable tools and supplies, but do not let shelves or containers narrow the route to the door. A compact layout only works if you can still remove the item at the back without taking apart the whole arrangement.
For a larger equipment shed, mark the footprint of each major item before choosing storage locations. Think about how it enters, turns, and leaves. Put smaller tools and supplies near the tasks they support, while preserving the equipment route.
A loft can add storage in some shed designs, but access and capacity vary. Check the specific loft’s load rating and usable clearance before placing items there. Do not assume that every overhead area can hold heavy or bulky goods.
7. Protect Stored Items From Moisture and Poor Airflow
Arrange boxes and equipment so you can inspect the floor, walls, and roof areas, and avoid hiding possible leaks behind stored items. Keep goods that are sensitive to moisture accessible, grouped, and clearly identified so you can check their condition without unloading the shed. Follow each item’s storage instructions, especially for delicate, electronic, or temperature-sensitive goods that may not suit an unconditioned space.
During a routine shed check, look for visible dampness, leaks, or changes in stored items and note where they appear. This can help you describe the problem before deciding what to do next. Airflow and condensation depend on the building, climate, and stored contents, so organization alone cannot prevent moisture problems. If dampness or condensation keeps returning, get advice based on the specific building and local conditions before changing ventilation or insulation.
8. Maintain the Organization System
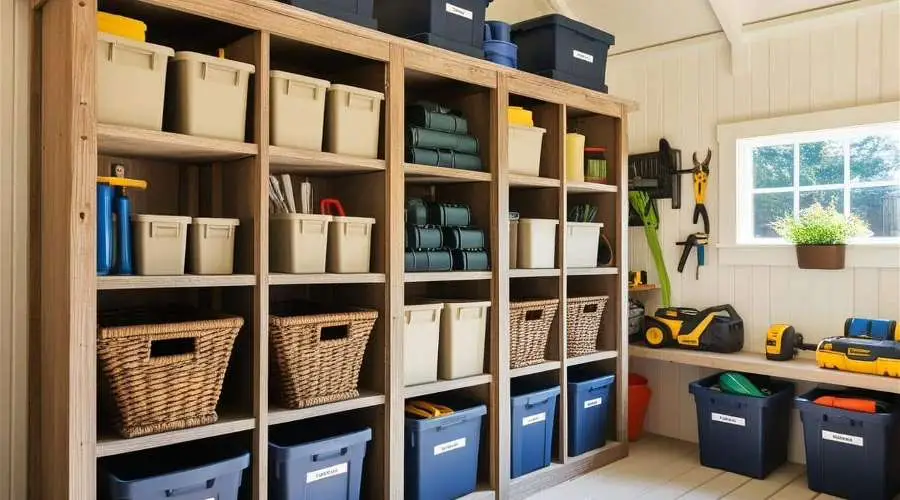
The organization system works best when each item has a clear place and goes back there after use. Keep frequently used tools near their assigned work or entry zone, and return them after a job instead of setting them down wherever space is open. If an item keeps ending up in the wrong place, adjust its zone to match how often and where you use it.
Use seasonal changes as a cue to rotate supplies: bring the next season’s items within reach, label anything moving to longer-term storage, and check that sensitive goods remain in suitable condition. A periodic walk-through can also catch blocked equipment routes, unreadable labels, leaks, or items that no longer belong in the shed. There is no single review interval for every property, so attach the check to a seasonal change or another routine already used on your site.
A Simple Shed Organization Checklist
- List the tools, supplies, and equipment that belong in the shed.
- Group items by task, use frequency, and season.
- Measure the largest equipment and map its route to the door.
- Assign zones before buying shelves, hooks, or bins.
- Check storage product ratings and building attachment points.
- Keep doors and equipment routes clear.
- Label containers and review item-specific storage instructions.
- Leave stored items accessible for routine visual checks.
- Revisit the layout when equipment or seasonal needs change.
Good shed organization begins with an inventory and a clear route for the items you use. Build zones around your work, choose storage that fits the items and structure, and keep sensitive goods within reach for inspection. If a shed is part of a larger equipment or storage project, measure the items and access needs before finalizing the building layout.